

The herringbone tile pattern is installed in 45 degrees and 90 degrees. The herringbone tile pattern is so unique today because the way of installing it is beyond expression. Globally, people prefer to lay tiles in a herringbone pattern at a 45-degree angle. What do I mean by 45-degree tips?
It is a situation whereby tiles are laid in a herringbone pattern at a 45-degree angle. In this case, all angles, either cut or placed, are at 45 degrees. To install this herringbone tile pattern, a speed square is recommended. The speed square is a triangle with one 90 degrees and two 45 degree angles. You might be wondering how to start a 45-degree herringbone. Of course, there’s nothing to worry about. This article will provide a complete guide on how to begin laying a herringbone pattern tile at 45 degrees.
To start with, it is expedient for you to know that you have to gauge the starting point of the pattern by marking a 45-degree angle on the corner of one brick. Then, you need to set out nine bricks. Proceed by lining up the top corners of the brick with a straightedge. Ensure that you measure the distance between the 45 degrees and the straightedge, and make sure you note it.
Furthermore, there are steps to follow to create a well-arranged and fitted herringbone tile pattern at a 45-degree angle. Therefore, below here are the steps to follow in making the 45-degree herringbone tile.
- Know the centre point
- Choose your starting point
- Start the tiling
Are you ready for the ride? Now let’s ride!
- Know the centre point: If you want to achieve success in laying herringbone tile at a 45-degree angle, you need to be aware of where the centre of the area you are tiling is. Many tilers out there find it so difficult to know the centre point of the place they are about to cover. For instance, if you are working on a wall, it may have more than one pattern. If it occurs like that, you must select the centre point of the area that will be covered using a herringbone tiles pattern. On the other hand, the case might be different in using herringbone tiles for floors. The challenge you will face is finding the centre of an area that is irregularly shaped. Here, you will need to consider where you will want the pattern to be radiating from to feel even. It is expedient for you to note that the line of symmetry of the design may or may not be readily noticeable. This depends on the shape of the area you want to cover. Therefore, to successfully lay the herringbone tile pattern at 45-degree angles, the first step is to find the centre point. The laying of this unique style must start from the centre.
- Choose your starting point: If you looked at the herringbone patterns online board, you might have noticed that, for the most part, the models show the same design and the changes are found in the tile colours that are used to create them. Several examples online demonstrated the herringbone tile pattern constructed at a 45-degree angle on a wall.
Therefore, if you want to lay a herringbone tiles pattern on a wall, your starting point will be on the lowest part of the wall in the center of the row. However, if you are working on a floor, there is something else to ponder.
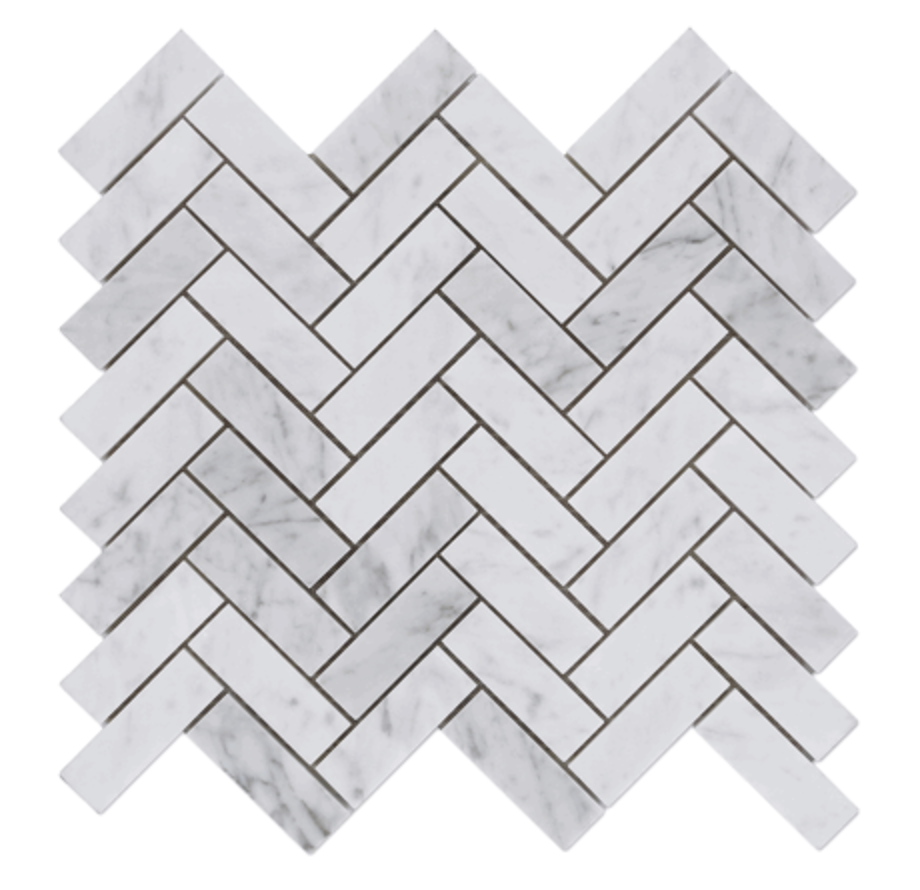
Tiling a floor in herringbone tiles pattern still calls for you to find the center point. Nevertheless, your pattern direction must also be specific. When the herringbone tile pattern is completed, it has a directional element in it. The tiles form what look like arrows aiming at alternating directions.
One set resembles arrows aimed at a specific route, while the next column aims at the opposite lane. This unique pattern repeats going to the left and the right until the space is occupied. Therefore, selecting your starting point is more complex if you work on a floor because you have to consider the direction your arrows will point.
Therefore, for the herringbone tiles pattern on walls, your starting point can be at the bottom of the area you want to cover with tiles. For floors, you will usually begin at your center point and radiate out in all directions. Click here to read about Uncommon patterns and tips you can use to lay your herringbone tiles.
- Start the tiling: The next step in laying herringbone tiles pattern at 45-degree angles is to begin tiling. Please note that the tilling is based on project type. How do I mean?
One will need a ledger board to tile a wall in a herringbone tiles pattern at a 45-degree angle. What is a ledger board? A ledger board is a straight board that you mount to the wall for your first row of tiles to lean on. What will you achieve in mounting your ledger board? It will help if you mount your ledger board so that the top edge is precisely one row high. Doing this will give you a sturdy surface on which to rest your tiles until the thin-set cures. Then, you can remove your ledger board. It is essential to place the first tile because it will be one the other tiles will rest on and align with. Also, for the herringbone tiles pattern on walls, the first tile must be placed on the ledger board at a 45-degree angle with the tile edge set so that the center of the tile’s edge will be on the middle line of the wall selection.
However, for the herringbone tiles pattern on the floor, you will initiate tiling at your selected starting point, keeping in mind the way you want your pattern “arrows” to “point”.
Also, placing your first tile in floor tiling projects is, in the same way, meaningful since all your tiles will be associated with the first one. As I have mentioned earlier, the 45-degree herringbone tile pattern will have observable arrows that point in a specific direction. If you are poorly placed the first time, your hands will point in a direction you don’t want them to go. Additionally, they may not mean precisely at the crucial point at which you aim them. For this reason, it is suggested that you dry-fit the tiles before setting them permanently using your bonding material.
Finally, there’s no cause for alarm. You don’t need to be panic about how to lay herringbone tiles pattern at 45-degree angles. The tips mentioned above will guide you through.